Lesson 2 Install QIoT Suite Lite
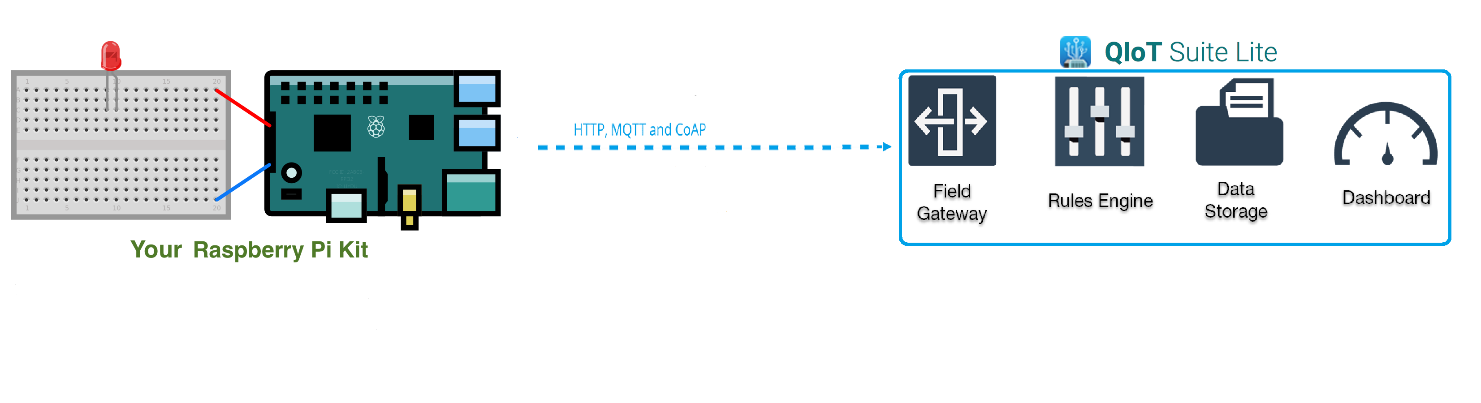
In Lesson 1 you already setup your device. In this lesson, you provision your QNAP QIoT Suite Lite software, and create your first device in QIoT Suite Lite.
There are two parts
A Install QIoT Suite Lite
B Create a new IoT application
part A :Install QIoT Suite Lite
- QIoT Suite Lite can be installed from the App Center.

- Launch and log in QIoT Suite Lite. The default username and password is "admin".


part B:Create a new IoT application
IoT Applications are a combination of Things, Rules, and Dashboards. We recommend that you first create a “Things” in IoT Application. This IoT Application allows you to keep a record of all of the devices that are connected to your NAS.
Rules make it possible to build IoT applications that gather, process, analyze and act on data generated by connected devices. Rules can apply to data from one or many devices, and it can take one or many actions in parallel.
Dashboards turn your data into analytics and reports that provide real-time insights.
All these elements provide user a complete IoT Application environment.

- If this is your first time to use QIoT Suite Lite, QIoT Suite Lite provides a wizard to help you quick setup a IoT application.
- Click “Quick Setup Wizard” to start quick setup wizard. After you read the QIoT Suite Lite introduction in pop window, click Next button.


- Create a New IoT application
- Enter IoT Application name, e.g., app_1.
- Rule name and Dashboard name will be generated automatically based on the name of IoT Application you fill in.
- Click “Next” to complete create a new IoT application

- Click "+ Add " to add this application’s device.

- After click "+ Add",In "Add Thing" pop window:
- Enter a name for your device (e.g., raspberrypi) and provide the device information (such as serial number and manufacturer) in Add attribute.
- If your device is already supported by QIoT (Arduino Yun,Raspberry Pi, Edison, and Linkit 7688 (Duo)), choose a pre-defined Thing Type.
- Click Add to add the device.

- Enter the IP address, User Name, and Password of your device and click the Connect icon. QIoT Suite Lite will check the connection with the device. After the connection is verified, click Next.

- In “Resources” step,Click "Add Resource".

- After click “Add Resource”,In “Add Thing Resource” pop window:
- Enter the name and ID for the sensor in Resource Name and Resource ID. Please note that the Resource ID will be used to create a Topic in the QIoT Broker. This ID should be unique for the device and no duplicates should be allowed for the same device.

- In "API Keys" step,
- If you want to embed QIoT dashboard widgets into web pages or access QIoT APIs from third-party applications, go to the API Keys tab and click "Generate New API Key". Click "Done".

- Your IoT application will now be created. Node.js sample codes and related files (certificate, resource information) will be uploaded to the specified path on your device.

- A sample dashboard will be created.

- Go to the Rule tab to define the flow or rules on how to process the data sent from the device, and how to present in a dashboard.

- In next Lesson ,we will introduce how to use sample code.Lesson 3 Connect your device to QIoT Suite Lite using MQTTS
Please visit QNAP github for QIoT Suite Lite sample code
"QNAP-Github"
全站熱搜


 留言列表
留言列表
 {{ article.title }}